If you’ve been wondering how to remodel a master bath and don’t know where to begin, you’re not alone. This room is one of the most used spaces in the house and can have a big impact on your daily comfort and your home’s overall value. Whether you’re aiming for a luxurious spa feel or want a more practical layout, a well-executed bathroom remodel can make your space feel brand new. This guide will walk you through every major phase, from design planning to finishing touches, in a clear and manageable way.
Why Remodel Your Master Bath?
Learning how to remodel a master bath can reveal the real benefits of updating a space that no longer fits your needs. An outdated master bathroom can be inefficient, hard to clean, or lack basic features like proper storage and lighting. Renovating this area lets you improve both form and function.
What to Expect from This Guide
You’ll find a practical breakdown of the remodeling process, including timelines, layout ideas, budgeting tips, and how to choose the right bathroom fixtures and finishes. Whether you’re doing it yourself or working with a contractor, this guide helps you avoid missteps and stay on course.
Planning Your Master Bath Remodel
- Define Your Goals and Vision
Decide what matters most in your new space. Are you hoping to add more storage, upgrade to a walk-in shower, or create a double vanity area? Having a clear vision will shape the rest of your bathroom renovation process.
- Establish a Realistic Budget
Think through all the potential costs from plumbing to tile installation and allocate your funds wisely. Be prepared for unexpected expenses, which are common in any bathroom remodel.
- Determine Your Must-Haves vs. Nice-to-Haves
List the non-negotiable items, like new flooring or updated electrical work, first. Then, list the extras like heated floors or premium fixtures that can be added if the budget allows.
Research Design Inspiration and Trends
Check out design blogs, home renovation shows, and social media for inspiration. Look for master bathroom layout ideas, color schemes, and storage solutions that match your style.
- Measure and Assess Your Current Space
Start by taking detailed measurements of your existing bathroom. This helps you understand the possibilities and limits of your space before you commit to any layout changes.
- Create a Floor Plan or Layout
Try a few different configurations on paper or using online design tools. You might find a better flow by relocating the vanity or creating a larger shower area.
- Hire Professionals vs. DIY: What’s Right for You?
Some homeowners prefer to tackle parts of the remodel themselves, like painting or demolition, while hiring specialists for plumbing or tile work. Weigh your comfort level and time availability.
Obtain Necessary Permits and Approvals
Depending on your local building codes and the extent of the changes, permits may be required. Always check before starting construction to avoid delays or fines.
- Safety First: Prepping for Demo
Before demo day, shut off water lines, electricity, and make sure the space is protected from dust. Wear protective gear and work carefully, especially around plumbing and electrical systems.
- Tools and Materials You’ll Need
You’ll want a pry bar, utility knife, safety goggles, gloves, and trash bins. For larger jobs, a reciprocating saw or shop vac might come in handy, too.
- Step-by-Step Demo Process
Start from the top down, remove mirrors, fixtures, then cabinetry. Next, tackle tile, flooring, and drywall. Be mindful of studs and wires behind the walls.
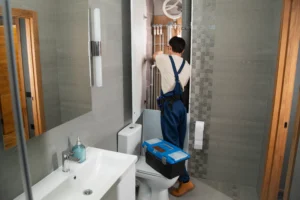
Plumbing, Electrical, and Structural Updates
- Update Plumbing Lines
Now’s the time to move or replace pipes for your new sink, tub, or shower. This step is essential for a successful master bathroom renovation.
- Reroute or Install Electrical Systems
Think about where you’ll want outlets, lighting, and switches. Add in extras like dimmers or motion sensors to improve convenience.
- Check for Mold, Water Damage, or Structural Issues
Inspect walls and floors before sealing anything back up. Fixing leaks or soft subfloors now will save time and money later.
Designing the New Master Bath
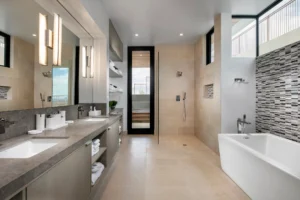
- Choose a Layout That Works for You
Your master bathroom layout should support your daily routine. Make sure there’s enough clearance around fixtures and that zones are easy to move between.
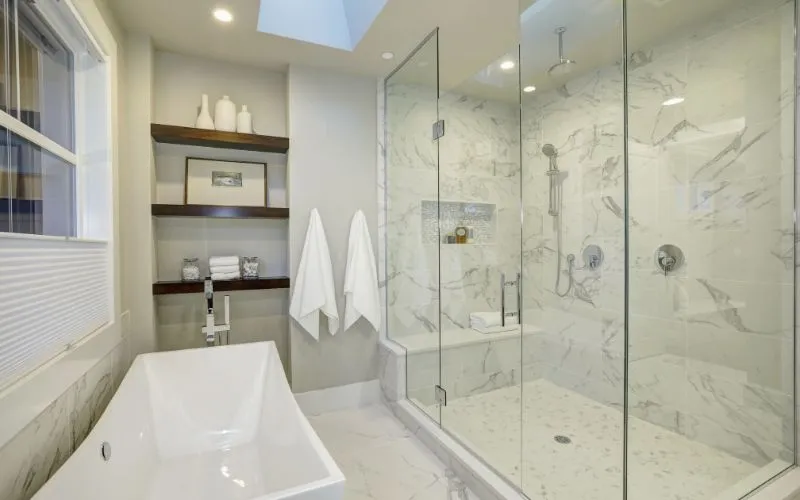
- Wet Room vs. Traditional Layout
Wet rooms offer a sleek, open concept but require more waterproofing. Traditional setups separate the shower area from the rest of the space and may feel more familiar.
- Single vs. Double Vanity
A double vanity is great for couples, while a single one may free up room for extra storage or a larger shower.
Selecting Fixtures and Features
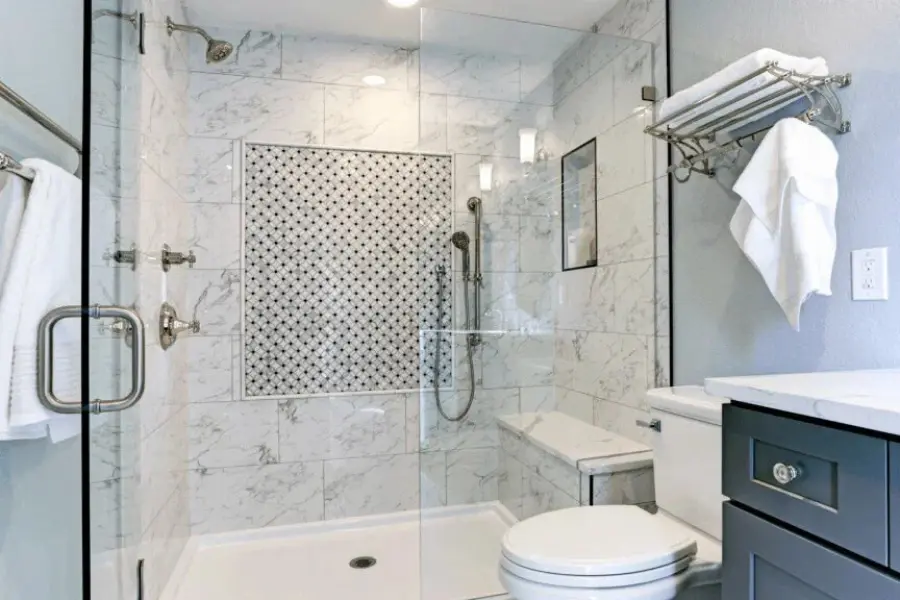
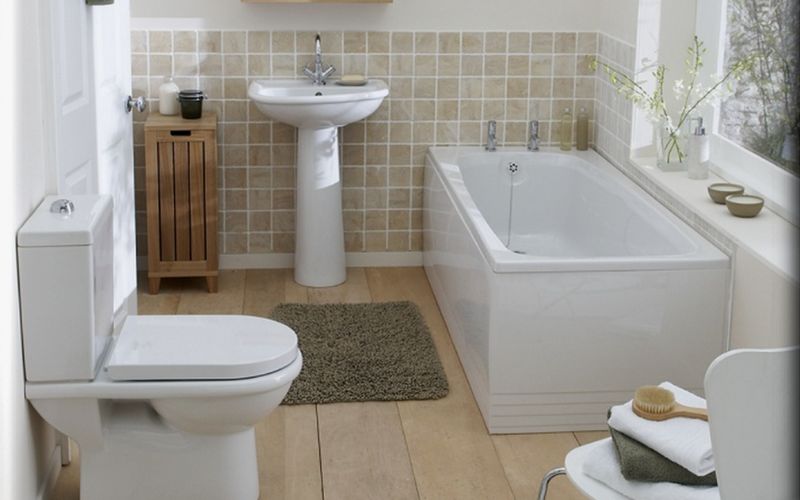
- Showers, Tubs, and Toilets
Pick fixtures that balance style and practicality. Frameless glass showers are a modern favorite, while a soaking tub creates a relaxing focal point. Low-flow toilets are both sleek and water-efficient.
- Vanity, Sinks, and Faucets
Choose vanities with built-in drawers or cabinets to reduce countertop clutter. Undermount sinks offer easy cleaning and a streamlined look. Coordinate faucet finishes with your overall design.
Lighting and Ventilation
- Layered Lighting: Ambient, Task, and Accent
A combination of lighting sources will make your master bath feel bright and comfortable. Use recessed ceiling lights, vanity sconces, and maybe a statement pendant.
- Exhaust Fans and Air Circulation
Keep humidity in check with a strong, quiet exhaust fan. Good ventilation helps protect your new walls and fixtures from moisture damage.
Flooring and Wall Options
- Waterproof and Slip-Resistant Materials
Stick with tile, vinyl plank, or natural stone, all great choices for wet environments. Smaller tiles with more grout lines offer better grip.
- Tile, Paint, or Wall Panels
Use tile for splash zones like the shower or vanity wall. Moisture-resistant paint and wall panels can cover the rest for a lower-maintenance option.
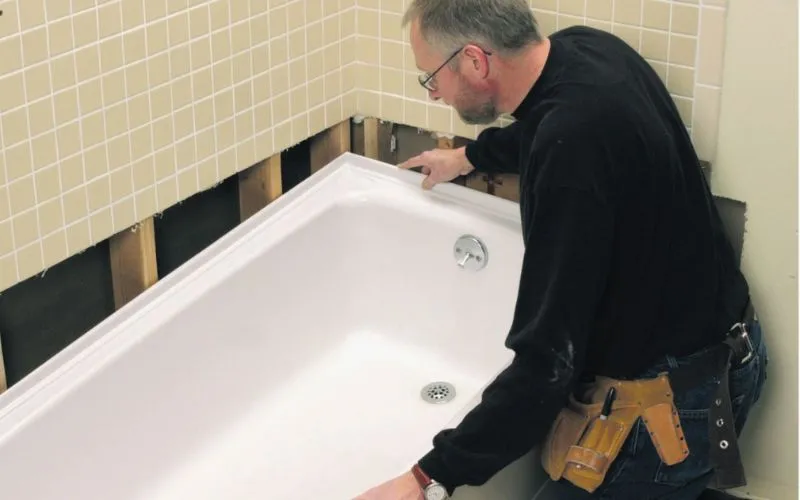
Installation and Construction
- Installing Drywall and Backer Board
Use mold-resistant drywall and install backer board in wet areas before tiling. These steps form the foundation for a safe and lasting bathroom renovation.
- Laying Tile and Flooring
Start with a level surface. Apply thin-set mortar and place tiles with even spacing. Let everything cure before applying grout.
- Mounting Fixtures and Cabinets
Once the walls and floors are ready, you can install your vanity, toilet, mirrors, and lighting. Double-check that everything is level and secure.
- Painting and Finishing Touches
Use satin or semi-gloss paint to resist moisture. Then move on to installing trim, outlet covers, and other finishing details.
Styling and Personalization
- Choosing a Color Palette
Stick with a neutral base and bring in personality through accessories, towels, and artwork.
- Adding Storage and Organization
Use drawer dividers, over-the-door storage, or open shelving to keep essentials within easy reach.
- Accessories, Decor, and Greenery
Candles, framed prints, and even a small potted plant can make your new bathroom feel warm and inviting.
How to Remodel a Master Bath on a Timeline
- General Timeline Overview
On average, a master bath remodel takes 4 to 8 weeks, not including planning. More complex jobs or permit delays can stretch that timeline.
- Factors That Can Affect Duration
Custom materials, contractor schedules, or hidden plumbing issues can all impact your progress. Try to stay flexible and patient.
Common Mistakes to Avoid
- Underestimating Time and Cost
Always allow more time and a little extra money than you think you’ll need. It’s better to be pleasantly surprised than stressed out.
- Skimping on Waterproofing
Good waterproofing is a must, especially around the shower and tub. Don’t rush this step.
- Ignoring Lighting and Ventilation
Too many bathrooms end up either too dim or too humid. Plan for both from the start.
Contact us to start planning a master bathroom that fits your lifestyle and design goals.
Conclusion
Now that you’ve learned how to remodel a master bath, you’re ready to take on the project with more clarity and purpose. Whether you’re updating a few key elements or starting from scratch, this guide has given you the foundation to design a space that works beautifully for your needs. With the right preparation, a smart layout, and quality fixtures, your new master bathroom will not only look stunning but will also support your lifestyle for years to come.